

Quality Control Standards for Winter-Weight Apparel
Executive Summary & B2B Positioning
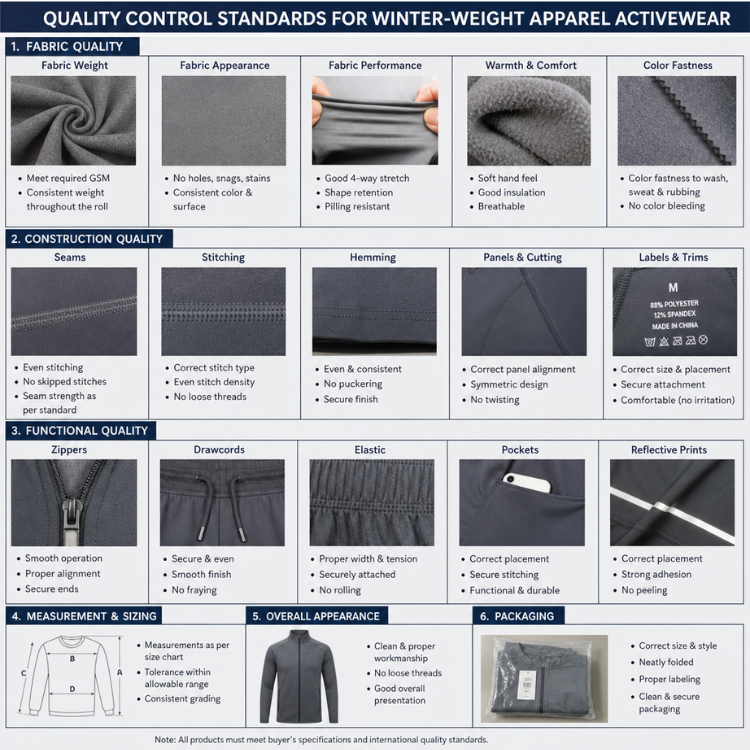
Quality control standards for winter-weight apparel should tie lab tests to factory checks so bulk goods match approved specs before shipment. These apparel testing standards support clothing quality control for cold weather apparel. For buyers working with ZIYANG activewear manufacturing (B2B), this guide gives a clear plan for stretch recovery, seam strength, and colorfastness. It also shows how to connect those results to process controls and US release calls, instead of treating a final visual check as proof of performance.
What Quality Control Standards Should Winter Apparel Meet?
Quality control standards for winter apparel should mix the right test method, buyer limits, garment specs, and market rules. A brushed knit midlayer and a woven insulated jacket need different tests, even when both are in the same winter line. Start with the fabric and the end use, then choose the method. ASTM separates low-force knit stretch tests from woven seam-strength tests.
For a B2B purchase order, keep three documents in sync:
- Technical Pack: List materials, build, measurement points, tolerances, trims, and pack.
- Performance Spec: Name each test method, edition, step, specimen direction, pretest treatment, and pass limit.
- Inspection Plan: Set lot ID, sample size, defect types, escalation steps, and release owner.
An approved sample is a guide, not the full spec. Check whether approval covered look only or also lab data, wash behavior, and build. Keep the approved version and note later changes. If you do not, inspectors may compare bulk production with an old sample.
For US activewear sourcing, keep destination market and factory origin separate. Selling to American brands does not mean the goods were made in the US, and origin labels must show the real production facts.
1. Turn Test Methods into Pass Rules
A method tells the lab how to get a result. The purchasing spec must also say which result is a pass. Keep the rule narrow enough that the factory, lab, and buyer reach the same call. Use this matrix as a spec tool, not as a universal winter-apparel rule set.
Standard Quality Testing Matrix
| Quality Need | Method or Approach | Pass Rule |
|---|---|---|
| Low-power knit stretch and growth | ASTM D2594 | Min stretch and max remaining growth by direction and rest time |
| Other stretch builds | Lab-chosen method, maybe ASTM D6614/D6614M | Limits tied to the chosen pull, hold time, and recovery step |
| Woven seam performance | ASTM D1683/D1683M | Min break force, good fail mode, and seam-open limit |
| Dry and wet rub transfer | AATCC TM8; TM116 where fit | Separate min grades for dry and wet use |
| Laundering colorfastness | AATCC TM61, set step | Separate limits for color change and stain |
These methods cover different fabrics and jobs. Do not swap them just because the lab has the gear. AATCC TM116 is another rub test, not a wash test.
For colorfastness, a buyer may ask for grade 4 in dry rub and wash checks, with a separate wet-rub target. Treat those as buying targets that need proof, not as fixed AATCC limits. Record half-grades the same way each time. AATCC treats 3-4 and 3.5 as the same note. Avoid a blanket seam-force or recovery limit; set those limits by testing the real fabric, seam build, fit, and use.
2. Build Prevention into Production Before Final Inspection
For this workflow, quality assurance means setting controls that stop defects; quality control means checking whether materials and garments meet the spec. Keep both roles visible in the production plan. A shipment check should verify the result of earlier controls, not be the first time a material problem is found.
For talks with ZIYANG activewear manufacturing (B2B), ask for one agreed control plan that covers these stages:
- Incoming Materials: Tag rolls, dye lots, fabric specs, fill lots, and trim lots. Set check cover based on risk and supplier history.
- Preproduction Sign-off: Confirm bulk test results, seam build, garment measurements, and label art before open cutting.
- In-line Check: Inspect first output and repeat checks after machine changes, material swaps, or repeat defects.
- Finishing Review: Compare garments before and after the real finish step; keep trace to the right batches.
- Pre-ship Release: Match lab reports, random garment checks, measurements, and pack findings.
If you use a fabric defect score, agree on the rules and reject point before inspection. Do not present a fixed roll percent as a universal rule. Keep material sign-off separate from the choice to mix shade groups within one garment. Give each checkpoint an owner and a hold rule. Clear steps like identify the affected material, isolate it, and get approval before use work better than a vague report-it note.
3. Checking Stretch Recovery Before Shipment
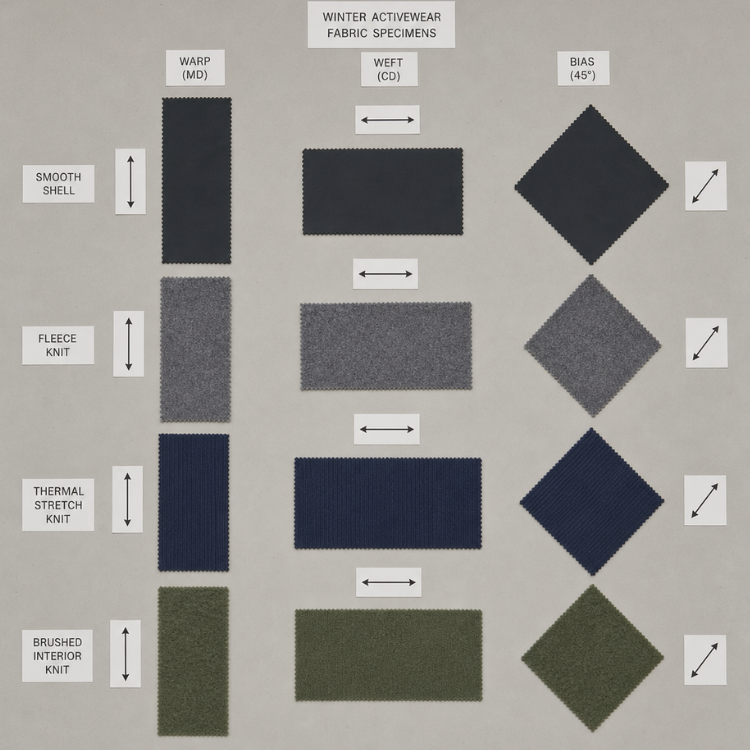
Check stretch recovery by testing identified bulk material under the right lab method, then add controlled garment checks. Record both stretch behavior and remaining growth. The phrase “stretches well” does not say how much shape stays lost. ASTM D2594 covers low-power knit fabric, while ASTM D6614/D6614M gives a CRE-based path with its own scope and limits.
3.1 Select Specimens and Lock the Method
Ask the lab to confirm method fit before testing. ASTM D2594 points users to other methods for support jobs. For stretch-woven material, ASTM D3107 may fit, but ASTM warns against using it for release calls because lab-to-lab precision is weak. Say that clearly if you plan to use it.
Use this specimen-control list:
- Identify style, fabric code, color, roll or dye lot, and finish state.
- Include each fabric direction named in the spec.
- Send material that matches bulk production, not an untraceable dev swatch.
- State whether testing is before wash, after wash, or both.
- Make the report show conditioning, load or extension, timing, and any change from the method.
Keep the method with the lab. Specimen size, load, hold time, and recovery time must follow the agreed method, not a made-up factory routine.
3.2 Link Lab Results to Garment Fit
As an extra factory screen, mark a set area on a waistband, cuff, or knee panel and use the buyer-approved pull step. Measure the area again after the agreed rest time. Record the start size, pulled size, recovered size, and any clear shape change. A hand-stretch check should be labeled as screening, not as an ASTM result. Use it to spot pieces that need review and to compare line-to-line sameness. Do not mix its numbers with lab data taken under different test conditions.
If a batch fails, hold the traceable affected lot and compare the result with dev records. Check material ID, finish history, and garment build before you allow a change. Retest the fixed bulk material with the same agreed method so the new result can be compared with the old one.
4. Checking Seam Strength on Heavy Garments
Check seam strength with real production seam builds, the right lab method, and clear build checks. For woven fabric, ASTM D1683/D1683M measures sewn-seam strength under force across the seam and helps judge seam efficiency and slippage. Its woven scope should not be used by default for knit fleece seams.
4.1 Inspect the Build Before Destructive Testing
Make a seam map for each style. For a jacket, include armholes, underarms, side seams, pocket joins, and other buyer-named load points. For winter training pants, include the crotch, seat, inseam, waistband, and pocket openings. At each mapped point, check the approved build:
- Seam and stitch type, thread spec, and stitch density.
- Seam allowance, edge capture, and reinforcement place.
- Skipped or broken stitches, raw edges, and clear needle damage.
- Alignment and bulk at join points, including shell-to-lining links.
Photograph key findings with a scale and seam location. Avoid a vague note like “poor sewing”; name the exact miss and the affected step.
4.2 Test the Real Production Assembly
Ask the lab to list the fabric, seam direction, thread, stitch type, stitch density, and specimen source. Use seams removed from production garments where the method allows it, or use clearly tagged builds that match production. ASTM D1683 notes that seam build choices and specimen prep affect results.
For knit or mixed-material builds, have the lab explain the chosen seam test. Include seam opening or extension behavior where it matters, not just a max-force result. Say whether wash after testing is needed for the product. Record how each specimen failed: thread break, fabric tear, seam opening, slippage, or another seen mode. For example, repeated thread breaks should prompt a different review from fabric damage near stitch holes. Treat the fail mode as data to review, not as an instant diagnosis. After a build change, confirm both strength and garment look.
5. Control Color Transfer and Wash Changes Separately
Use separate checks for rub transfer and wash behavior. AATCC TM8 measures color transfer by controlled rubbing with dry and wet white test cloths. AATCC TM61 measures colorfastness under sped-up washing, so passing one does not prove the other.
5.1 Run Dry and Wet Rub Checks
For pre-ship planning, list the colors, prints, contrast panels, and trims that need coverage. Pay special attention to dark cuffs next to pale linings. Test finished bulk material, with extra pretreatments where the spec calls for them.
Ask the lab to report dry and wet results on their own, with specimen ID and the grade scale used. TM8 uses the Gray Scale for Staining or the Chromatic Transference Scale. Do not average a fail in wet rub with a pass in dry rub. If a factory uses a quick white-cloth rub check, define its purpose and setup. It can flag material for lab testing, but an informal rub should not be sold as a standard grade.
5.2 Check Wash Results Against the Care Spec
For AATCC TM61, name the exact procedure instead of asking for a generic wash test. The method uses set heat, detergent, and rub conditions. The sped-up wash is not a promise of garment life, so the lab should confirm that the chosen step fits the goal. Request separate reports for color change, staining, and observed look. Use the right rating scale for each result; AATCC has separate gray scales for color change and stain, where grade 5 means no visible change in the right reference pair.
If a dark shell stains a pale lining in an agreed test, hold the affected mix for review. Check the exact materials and process records, then repeat the right colorfastness test after the fix. Changing the care label should never be a shortcut around proof of care claims.
6. Winter-Material Checks Without Mixing Weight and Warmth
Keep fabric mass, surface wear, and insulation performance as separate spec items. ASTM lists different methods for fabric mass per area, Martindale abrasion, and Martindale pilling. Thermal and water-vapor resistance are also separate measures of clothing material and multi-layer builds.
Winter Performance Specification Criteria
| Category | Inspection Focus & Evaluation Method |
|---|---|
| Fleece Programs | Set approved GSM range, evaluate brushed look, pile direction, face-to-back match, and panel shade against controlled references. Add pilling or abrasion tests where specified. |
| Insulated Jackets | Check fill type, set amount or spread, quilting layout, lining attachment, and closure function. Review representative garments post-wash. |
| Use-Case Differentiation | Distinguish running midlayers (breathability/flexibility focus) from casual insulated jackets (weatherproofing/thermal focus) during dev checks. |
7. Pre-Shipment Sampling as a Documented Release Decision
Agree on lot definition and inspection readiness before the inspector arrives. Record what is done, what is packed, and which quantities are not on hand. A report that covers only open cartons should not stand in for the full order. ANSI/ASQ Z1.4 is an accept-sample system for attribute checks with normal, tight, and reduced plans plus switch rules. When you use it, name the inspection level, AQLs, and plan instead of picking a sample size by habit.
Pre-Shipment Release Workflow:
- Check References: Confirm the current tech pack, approved sample, measurement sheet, defect guide, and lab needs.
- Name the Lot: Record counts by style, color, size, and key batch.
- Draw the Sample: Pick at random under the agreed plan and log coverage. Keep targeted risk checks separate from the statistical sample.
- Inspect Garments: Review look, mapped seams, measurements, closures, labels, and approved work rules.
- Match Testing: Pair lab reports with the real bulk materials and confirm all needed results are in hand.
- Check Pack: Verify mix, counts, barcode ID, hangtags, carton marks, and purchase-order refs.
- Set the Call: State pass, hold, or fail, with unresolved items and the person who can release the goods.
Set critical, major, and minor groups before inspection using product-specific examples. Train inspectors on agreed defect types and their effects instead of relying on an arbitrary split. Keep destructive-test sampling separate from visual-inspection sampling.
8. US Compliance Checks Alongside Performance Inspection
For activewear made for the US market, performance approval and regulatory compliance need separate review. CPSC’s general apparel fire-safety rules are in 16 CFR Part 1610. Test exemptions depend on named conditions and do not remove the base fire-safety rule.
Add a label review before pack approval. FTC guidance generally says covered textiles must show fiber content, country of origin, and the business name. Care rules are covered by a separate rule. Check approved art against real materials and production facts. Children’s apparel needs its own compliance review rather than an adult checklist copied over, as CPSC lists extra rules and sleepwear differences.
9. Use Inspection Findings to Prevent the Next Failure
Close the loop with traceable corrective action, not just a fixed inspection sample. For each major fail, record the rule, seen result, affected quantity, hold call, likely cause, fix, and proof of recheck. Keep the first finding with the retest.
- Remaining Growth Failure: Compare material lots and finish records, then verify fixed material with the agreed recovery test.
- Seam Failure: Review the tested build and failed pieces, isolate the affected step, and check any build change.
- Color-Transfer Failure: Split the affected colors or mix, review process records, and repeat the right colorfastness test.
Track repeat issues by material, step, color, and time period rather than by shipment-wide pass rate. Give each action an owner and a due date. On later orders, ask for proof that the fix still works before you reduce checks.
Conclusion: Evidence-Based Release Decisions
A useful clothing quality control program links approved specs, traceable bulk tests, factory checks, and a clear ship call. For buyers working with ZIYANG activewear manufacturing (B2B), agree on that proof set before production begins. Set what must pass, who handles exceptions, and what stays on hold. Then release winter apparel against those rules, not against look alone.
Frequently Asked Questions (Technical Q&A)
Q: Why is a final visual inspection not enough to approve winter-weight apparel for shipment?
A: A final visual check can confirm look, measurements, work quality, labels, and pack, but it cannot prove stretch recovery, seam strength, colorfastness, fire safety, or wash behavior. Pre-ship release should match both inspection findings and lab reports tied to the real bulk materials and batch. A visual check should verify earlier controls, not replace them.
Q: How should buyers decide which test methods to use for stretch recovery, seam strength, and colorfastness?
A: Buyers should start with the fabric, build, and end use, then choose the right method. For example, ASTM D2594 fits low-power knit fabric, while ASTM D1683/D1683M measures woven seam performance. AATCC TM8 is for rub transfer, while AATCC TM61 is for wash colorfastness. The purchasing spec should name the exact method, step, specimen direction, pretreat, report item, and pass limit.
Q: What should happen if a bulk batch fails stretch, seam, or colorfastness testing?
A: The affected quantity should be put on hold and traced back to the right material lot, dye lot, build step, or finish step. The buyer and factory should study the exact fail mode rather than guess. After applying a corrective fix, repeat the exact same agreed test method so the new result can be compared directly with the previous fail data.
Q: How should pre-shipment sampling be tied to the final release decision?
A: Sampling should use a written lot definition, inspection plan, and release flow. If ANSI/ASQ Z1.4 is used, the buyer should name the inspection level, AQLs, and switch rules instead of choosing a sample size by habit. The release decision should mix random garment checks, measurement review, pack review, and matching of lab reports.
Q: Why should we handle US compliance checks separately from performance quality control?
A: Performance approval and regulatory compliance cover different risks. A garment may meet buyer performance targets but still need separate review for US rules like fiber content, country of origin, business identity, care labels, and fire-safety rules (16 CFR Part 1610).
Post time: Nov-03-2026
